
Squarespace Translation plugin
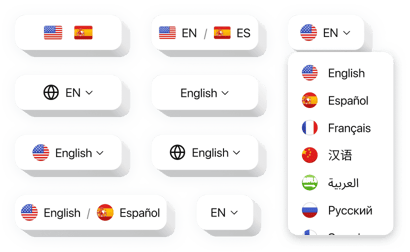
Create your Website Translator plugin
Speak to the visitors you already get from abroad
Visitors reach your website from search, maps and social media all over the world, and a page they can’t read rarely turns into a booking or an order.
Keeping a hand-made copy of every page for each language takes time and falls behind with every edit. The Website Translator makes the whole website multilingual with one widget: add the languages you need, and visitors switch from a compact menu.
Every page in a language your visitor reads
Google Translate handles the text of every page, including content that loads after the page opens, such as other Elfsight widgets. You don’t build or maintain a second version of anything.
Chosen once, kept from page to page
A visitor picks a language once and keeps it while moving from your homepage to services, the menu or the contact page. The new language loads in place, so the page doesn’t reload and nobody loses their spot.
Names and terms stay as you wrote them
Machine translation doesn’t know that your studio name or a signature dish should stay as it is. Translation Exclusions leave those words untouched, and a connected Google Sheet lets you correct any line and see the change on your website.
Key Features for portfolios, menus and shops
- Automatic translation into 143 languages – Google Translate covers every page, with regional variants from Brazilian Portuguese to Simplified and Traditional Chinese.
- Language memory – the choice a visitor makes follows them to every page they open next.
- Your own translations and exclusions – fix wording in a Google Sheet and keep brand names, product names or whole elements untranslated.
- Inline or floating language switcher – sit it in a section beside your text, Fluid Engine included, or float a button in any of 8 preset positions and shift it vertically or horizontally.
- Styled to your design – a choice of styles, your own background, border and text colors, 3 sizes, 3 corner shapes and a font from the list make the switcher match your pages.
- Switching without a reload – the page changes language while the visitor keeps reading.
- Google Analytics events – Language Changed and Widget Opened show how visitors use the menu.
Test every setting in the live editor – no sign-up needed.
Made for Squarespace plans and versions
- Works on every plan – Core, Plus and Advanced run the code in a Code block or Code Injection, and Basic takes it through an Embed block.
- Versions 7.0 and 7.1 – the switcher works in both, including sections built with Fluid Engine.
- One menu for the whole website – paste the code into the footer once, and the switcher appears on every page, including pages you add later.
- Edits without the page editor – add a language or restyle the switcher in Elfsight, and your published pages update on their own.
- Not tied to one platform – the same widget can run on your other websites and domains from a single Elfsight account.
How to add the Website Translator to Squarespace
Build the switcher in Elfsight first: pick languages on the Languages tab and colors and size on the Design tab. The Add to website for free button then shows a short code you’ll paste into your pages in one of the ways below, depending on your plan and version.
Before copying the code, choose the embed type in Settings: Floating for a button on every page or Inline for a switcher inside a section. Squarespace doesn’t run scripts while you’re editing, so check the result in preview or in a private window.
Method 1: Add an inline switcher to a page in version 7.1 (Core, Plus, Advanced)
- Go to Website → Pages, open the page that should carry the switcher and click Edit to enter the page editor.
- Hover where the switcher should go, click Add Section and choose Add a blank section.
- Click Add block, pick Code from the block menu and click the pencil icon on the new Code block.
- Paste the code into the Content field, leaving Display Source turned off.
- Drag the block’s right border to widen it, click Save and open the published page.
Method 2: Add an inline switcher to a page in version 7.0 (Core, Plus, Advanced)
- Go to Website → Pages, choose the page and click Edit above the section you need.
- Click the + icon where the switcher belongs and choose Code in the block menu that opens.
- Paste the code into the Content field – a “Script Disabled” placeholder in the editor is normal – and click Save.
Method 3: Put a floating switcher on all pages with Code Injection (Core, Plus, Advanced)
- Go to Website → Pages and scroll to the bottom of the left menu.
- Open Code Injection – it sits under Custom Code in 7.1 and under Website Tools in 7.0.
- Add the code to the Footer box and save.
- Open the live website in a private window, pick a language and click through two or three pages to see it stay.
The editor may show extra space below the footer after this step; visitors won’t see it.
Method 4: Basic plan, footer Embed block
- Open your website, click Edit, hover over the footer and open the footer editor.
- In the footer, click Add Block and choose Embed from the block list.
- Click the pencil icon, select Code Snippet and click Embed data.
- Paste the code into the Embed data window, click Save and open a live page to see the floating button.
This needs a visible footer; without one, add an Embed block to each page through Add Section → Add a Blank Section instead.
Still no switcher? Make sure the page is saved and open it while logged out. If you’d rather not do it yourself, invite our team as a contributor with Administrator rights, and we’ll install it for free.